Using the Workflow View

We recommend using the Workflow View when working with tasks, processes, issues, cases… Simply entities that represent a work item. And that are used in your company workflows.
In the Workflow view, you can filter, sort, or group your work items. It is also possible to quickly switch between the details of the items, see linked records and manipulate with links, comment on the work items, and see their audit log (history of changes).
Moreover, you have a full control of what attributes (columns) are displayed where.
The Workflow view also allows you to display several different tables on a single screen.
Basic Configuration of the View
You can use the Workflow view similarly to the Table view. You can resize table columns, reorder them, hide them, edit values… Simply anything.
Workflow view is also capable of showing existing records when adding a new row or editing an existing one. This is useful for example when creating a record for a new client, account, issue etc. to avoid duplications.
What is new is the ability to resize the table horizontally. This is especially useful, then there are more table on the page as you will see in a bit.
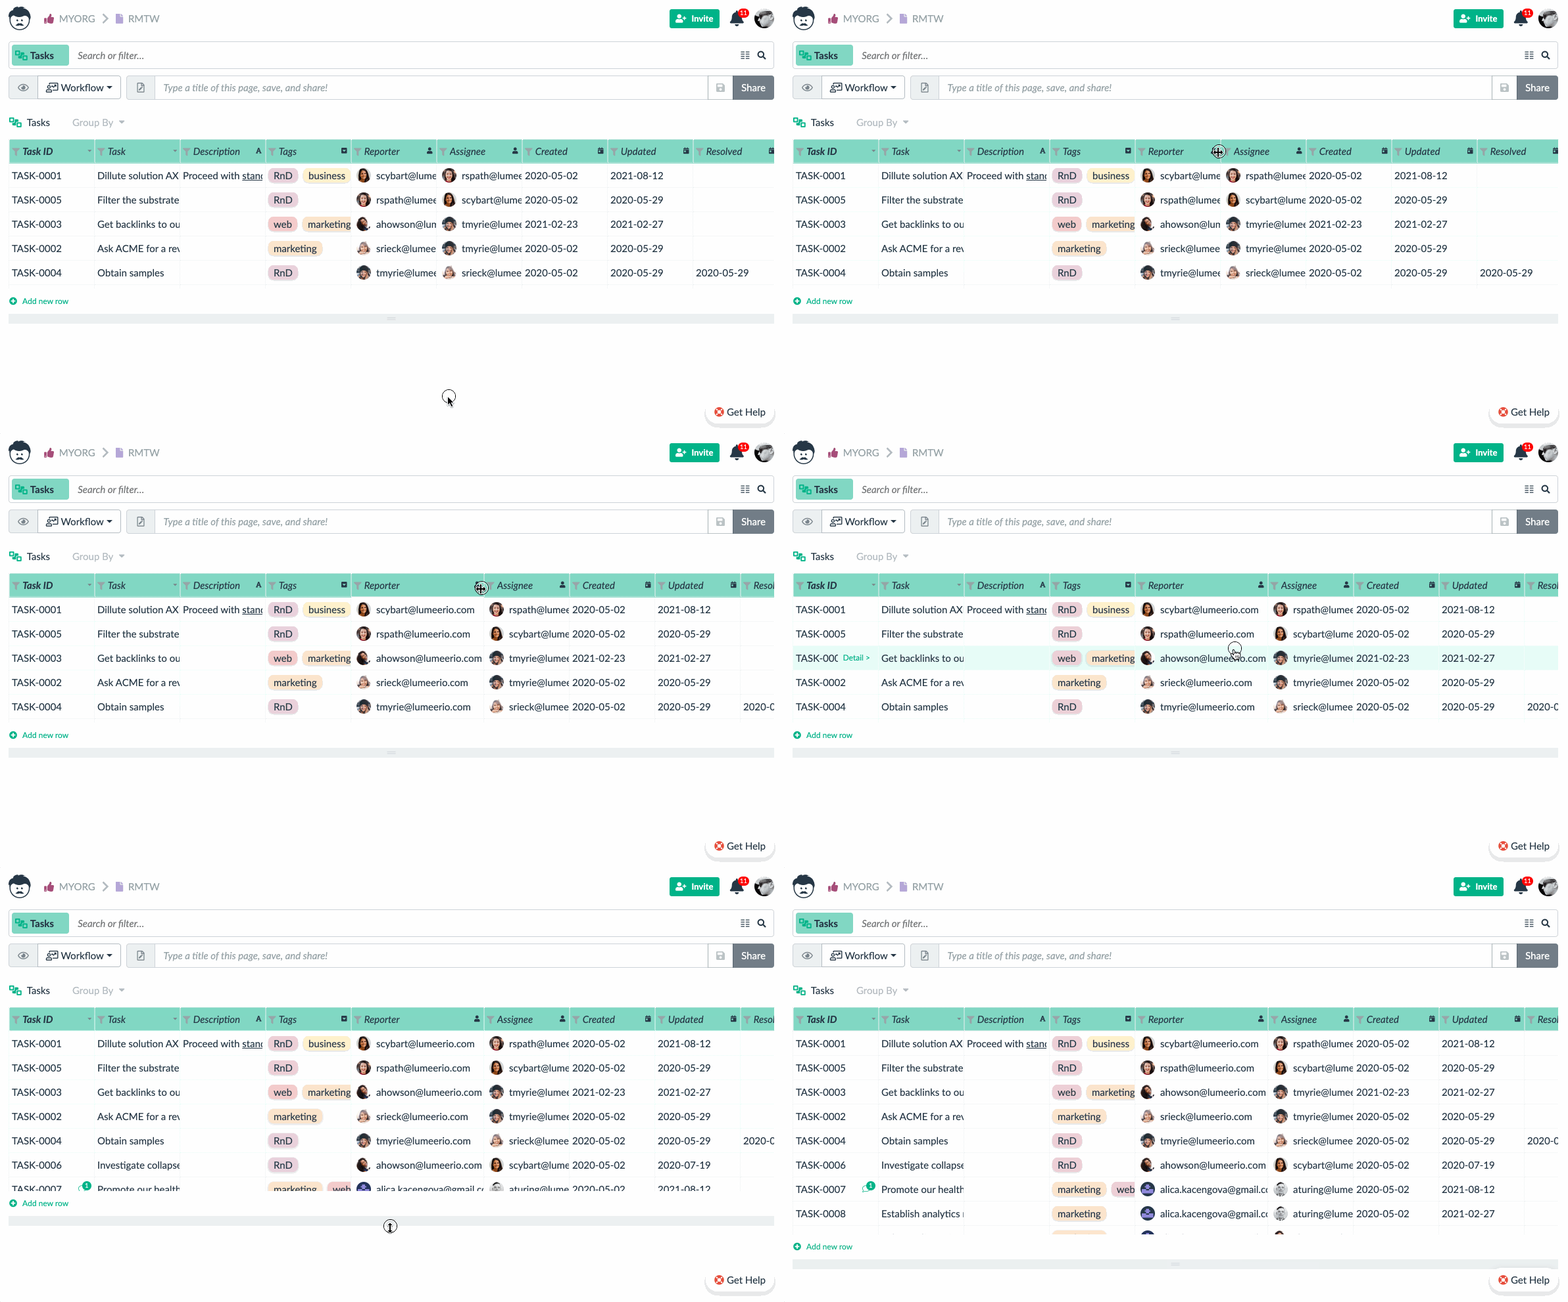
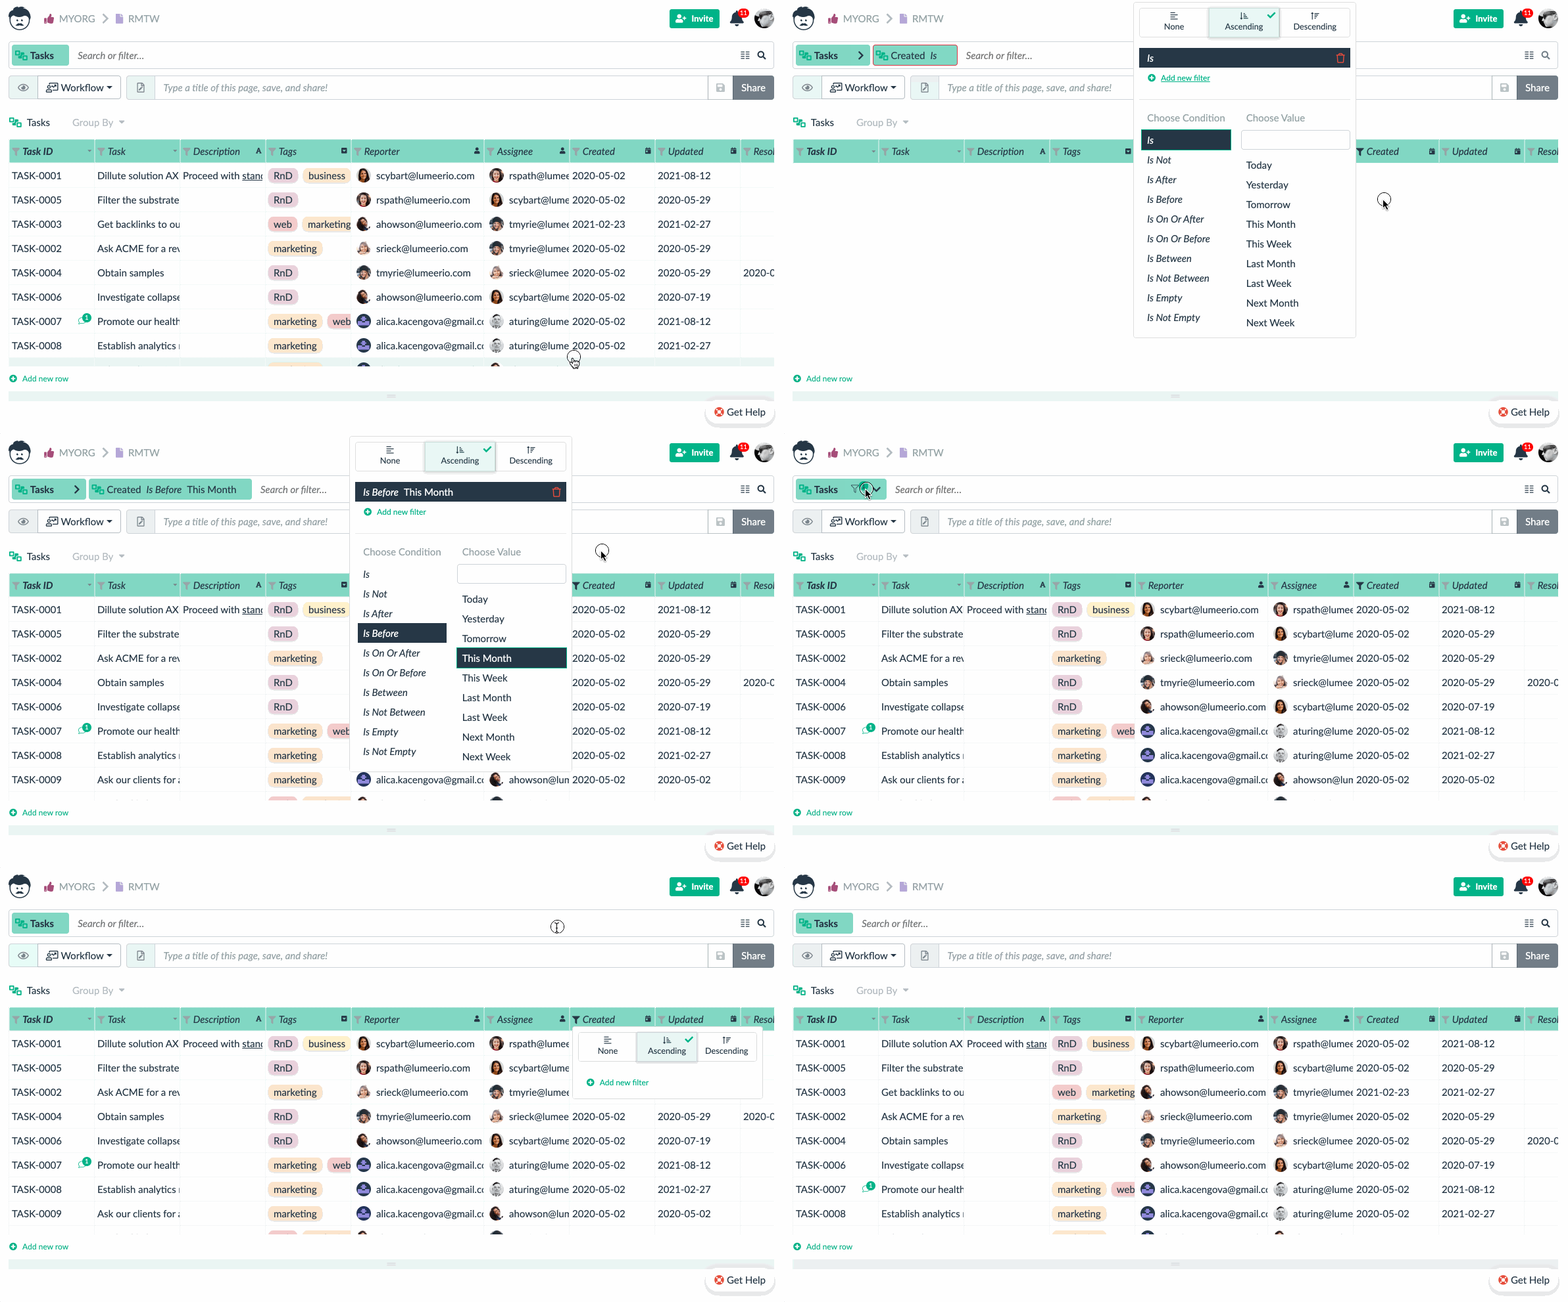
The Workflow view is also directly showing filters in the table headers. So that you can easily recognize which columns are sorted or filtered. With that, you can also construct your filters. The filters are then automatically added to the search bar at the top of the screen.
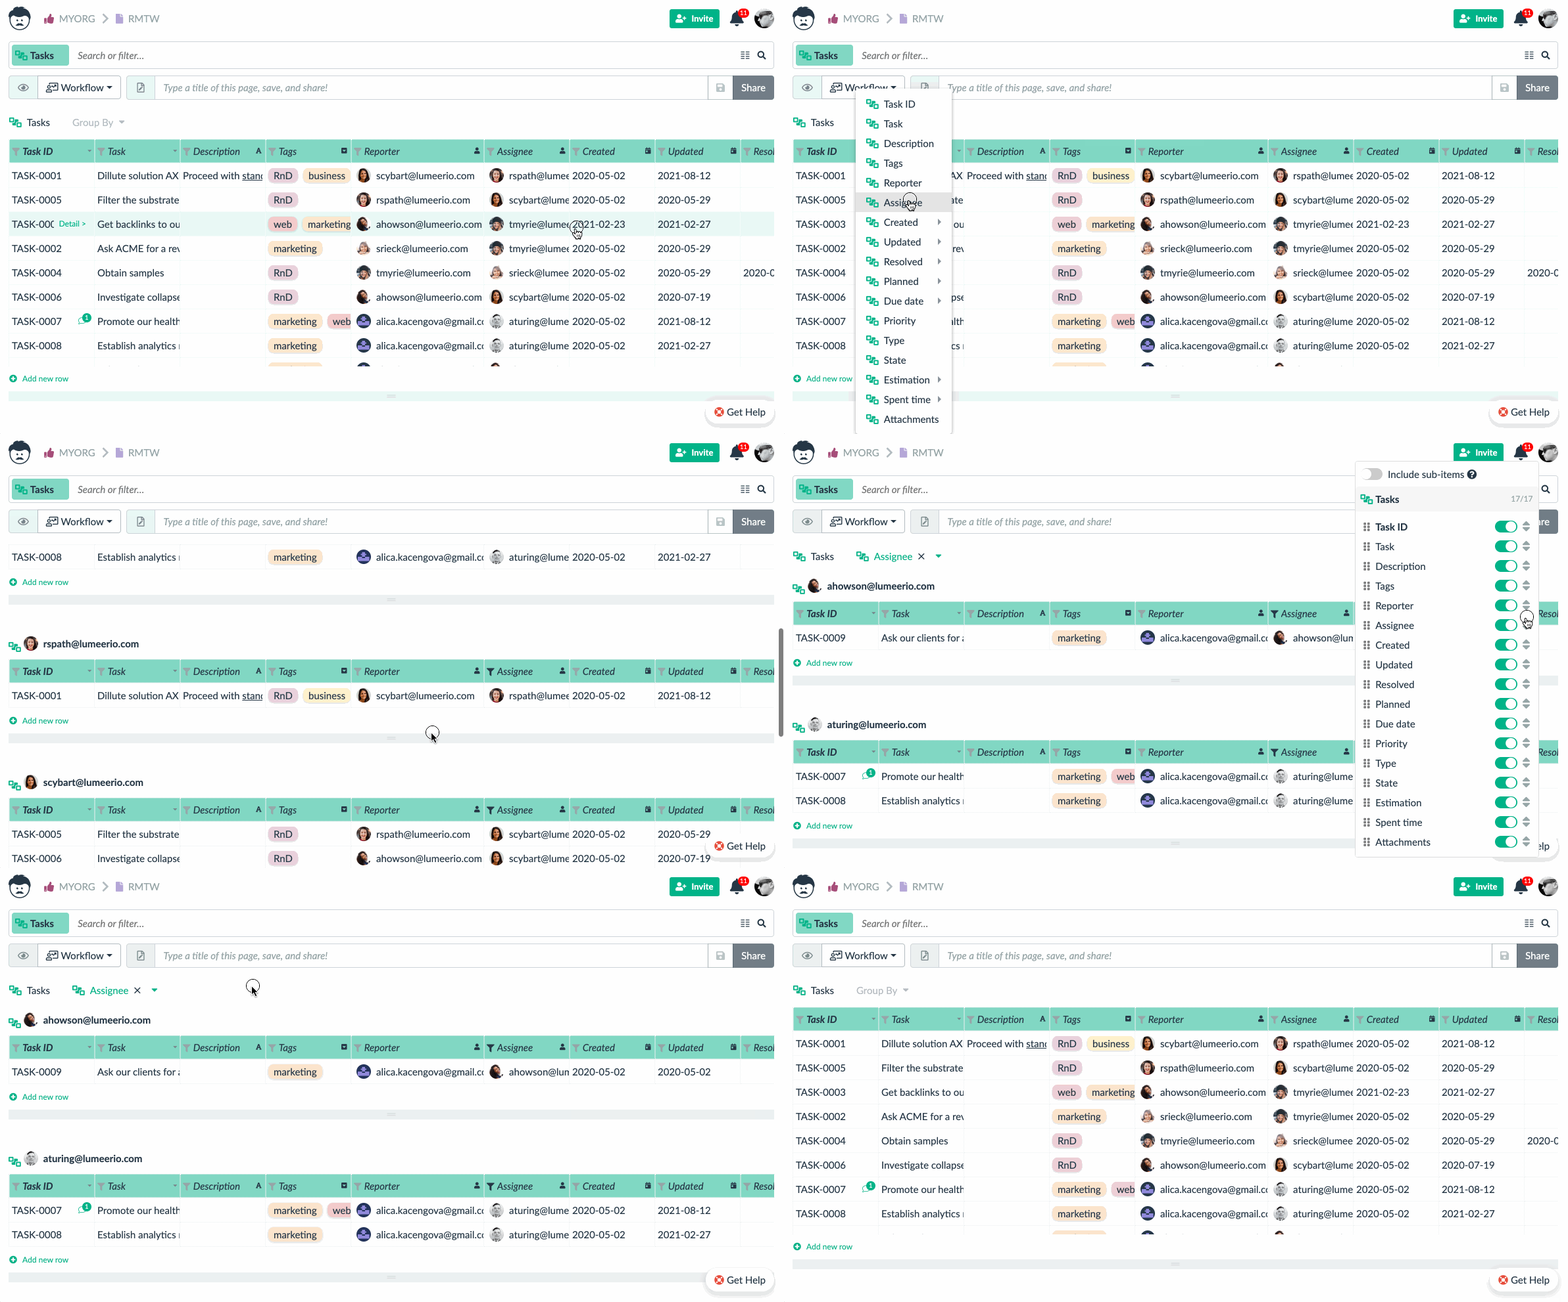
Group the Work Items
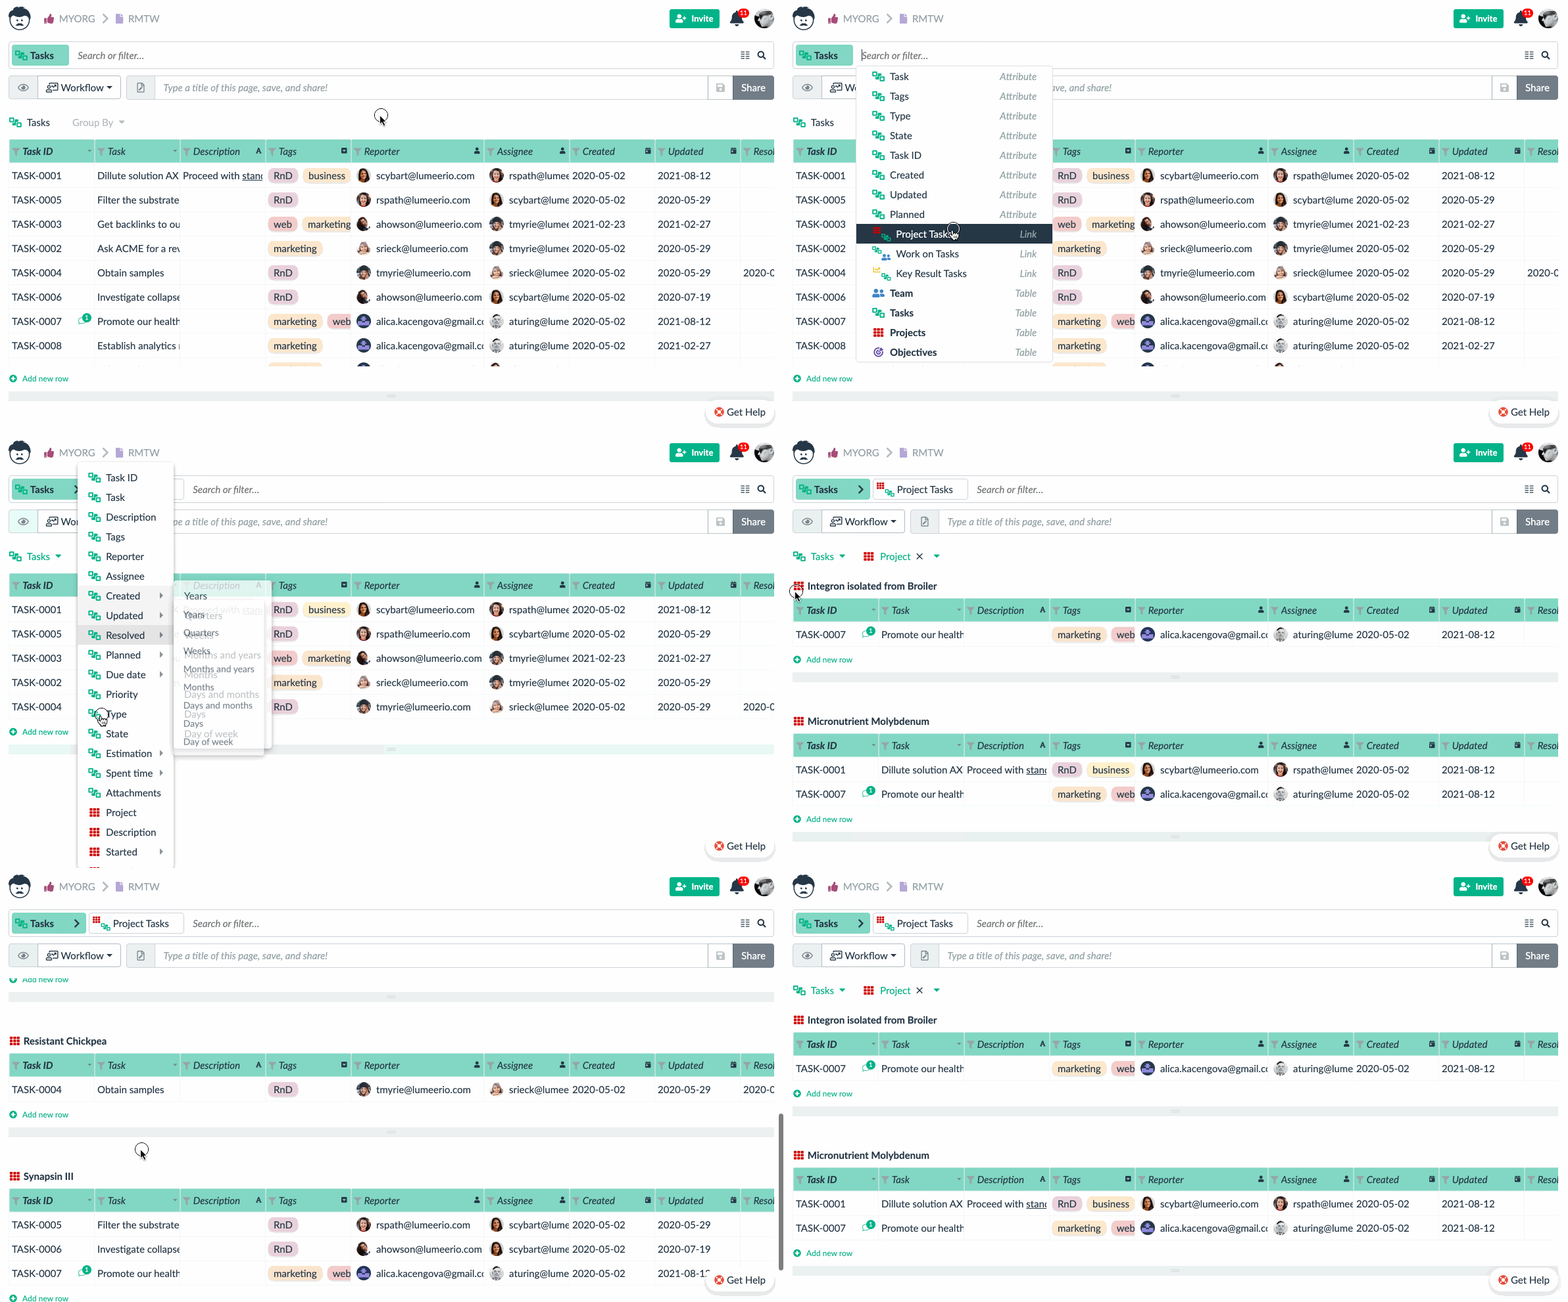
Another great feature of the Workflow view is the ability to group items (records) by some attribute value. For every unique value, a separate table is created. The order of the tables respects the attribute sorting order.
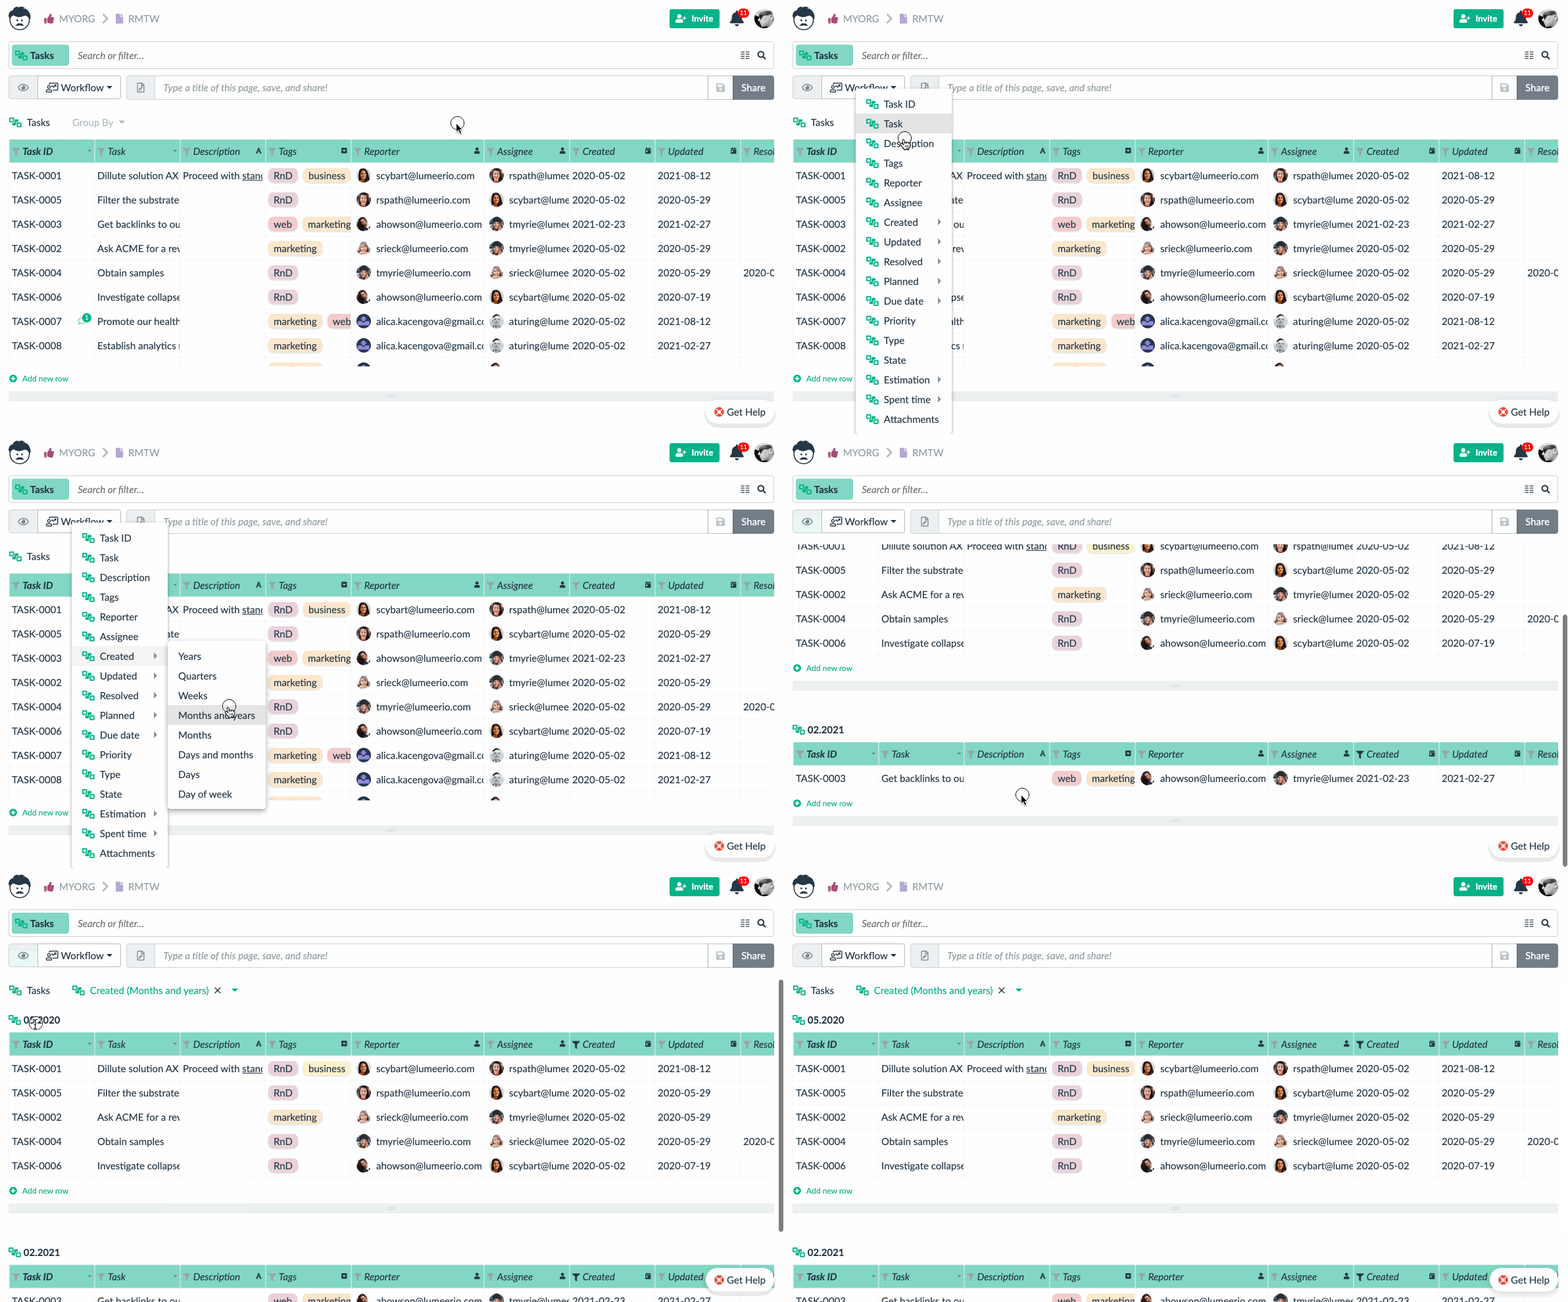
Because Lumeer understands your data, it is possible to use smart grouping of values like dates. Most probably, you won’t need to have a separate table for every date value. Rather, you might be interested in groups by weeks, months, years, or so.
Yet another secret gem is in the ability to group by an attribute from a related table. In the example, each of the tasks is actually linked to a project. You can add the relation to the search query. This will then allow you to select the project name as the grouping attribute.
The Detail Panel
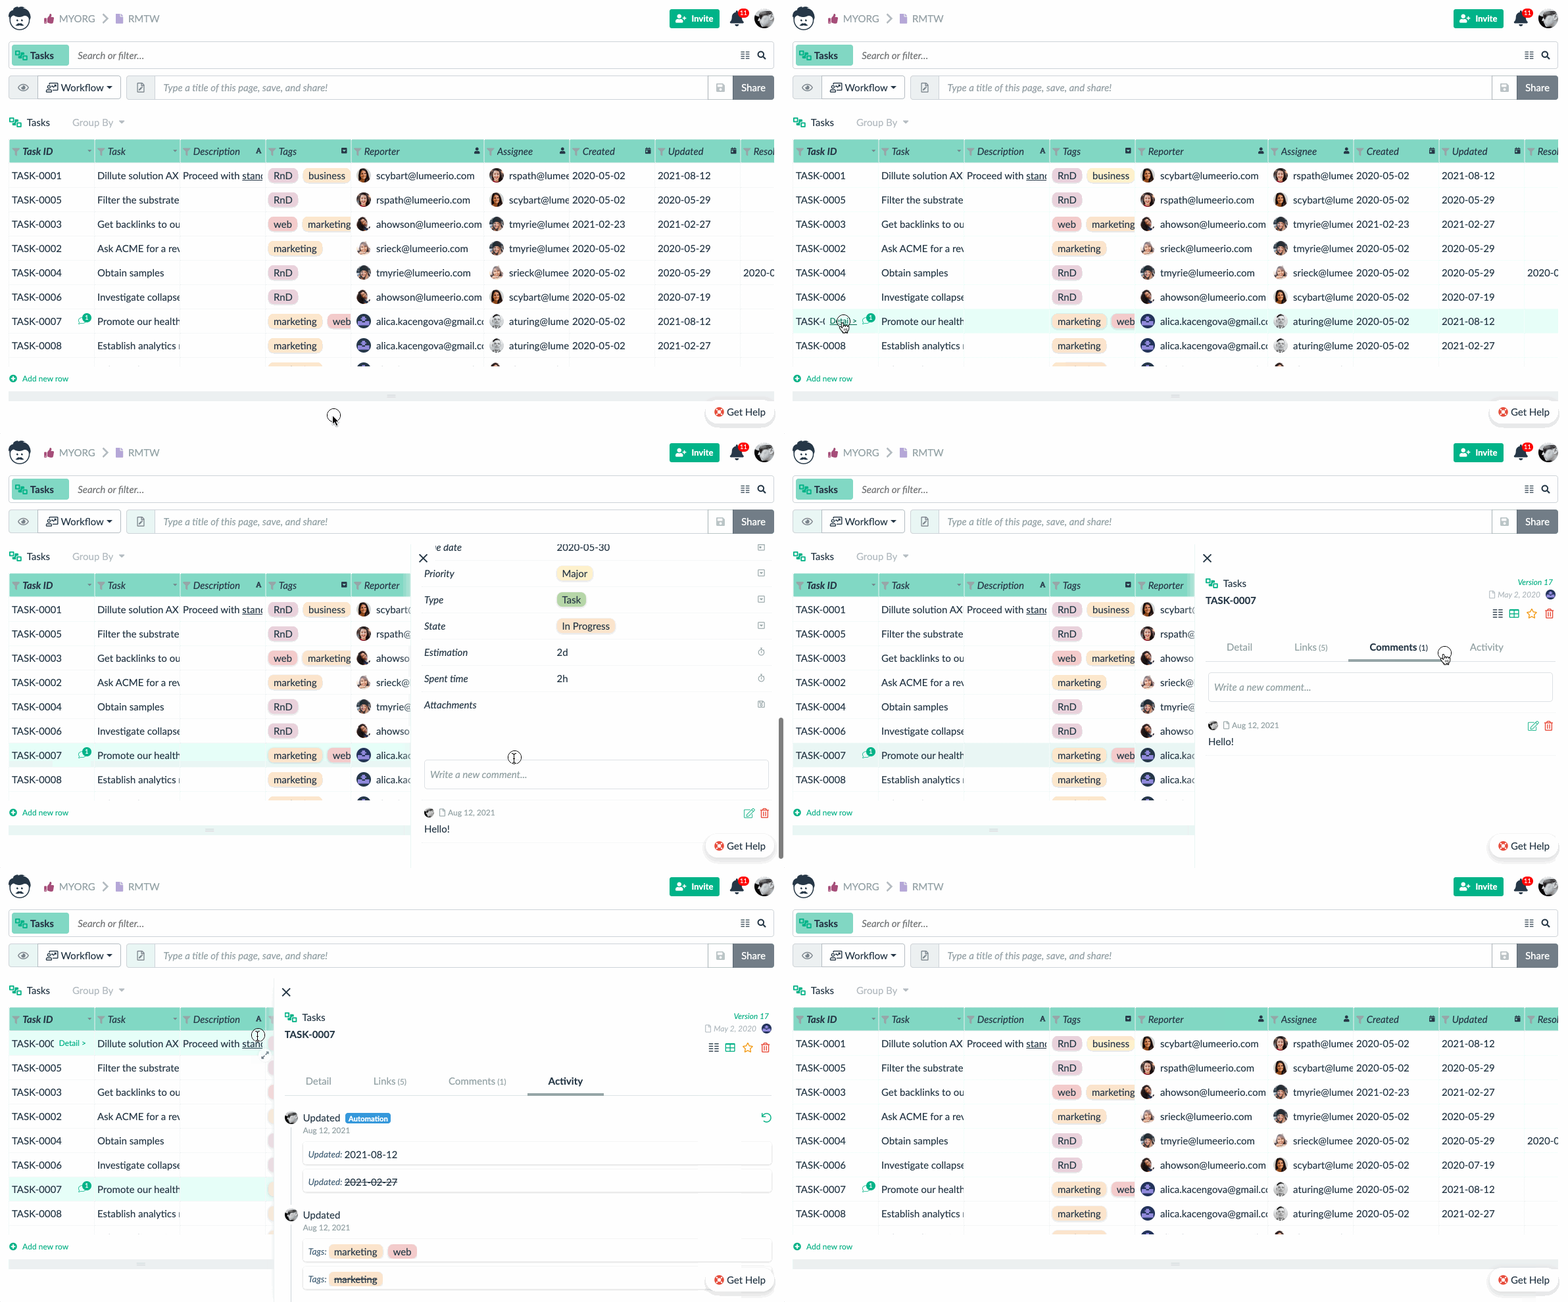
The core value of using the Workflow view is in the detail panel. In this detail panel, you can find everything about the selected record. Also, you can notice that when there is a comment on a record, it is immediately visible in the table.
For your convenience, you can resize the detail panel as needed. The detail panel is then closed by the cross icon on it, or by clicking outside of the panel and all records.
Managing sub-tasks and other hierarchies
One of the recent additions to the Workflow view is a full support of collapsible hierarchies. This is especially useful for subtasks.
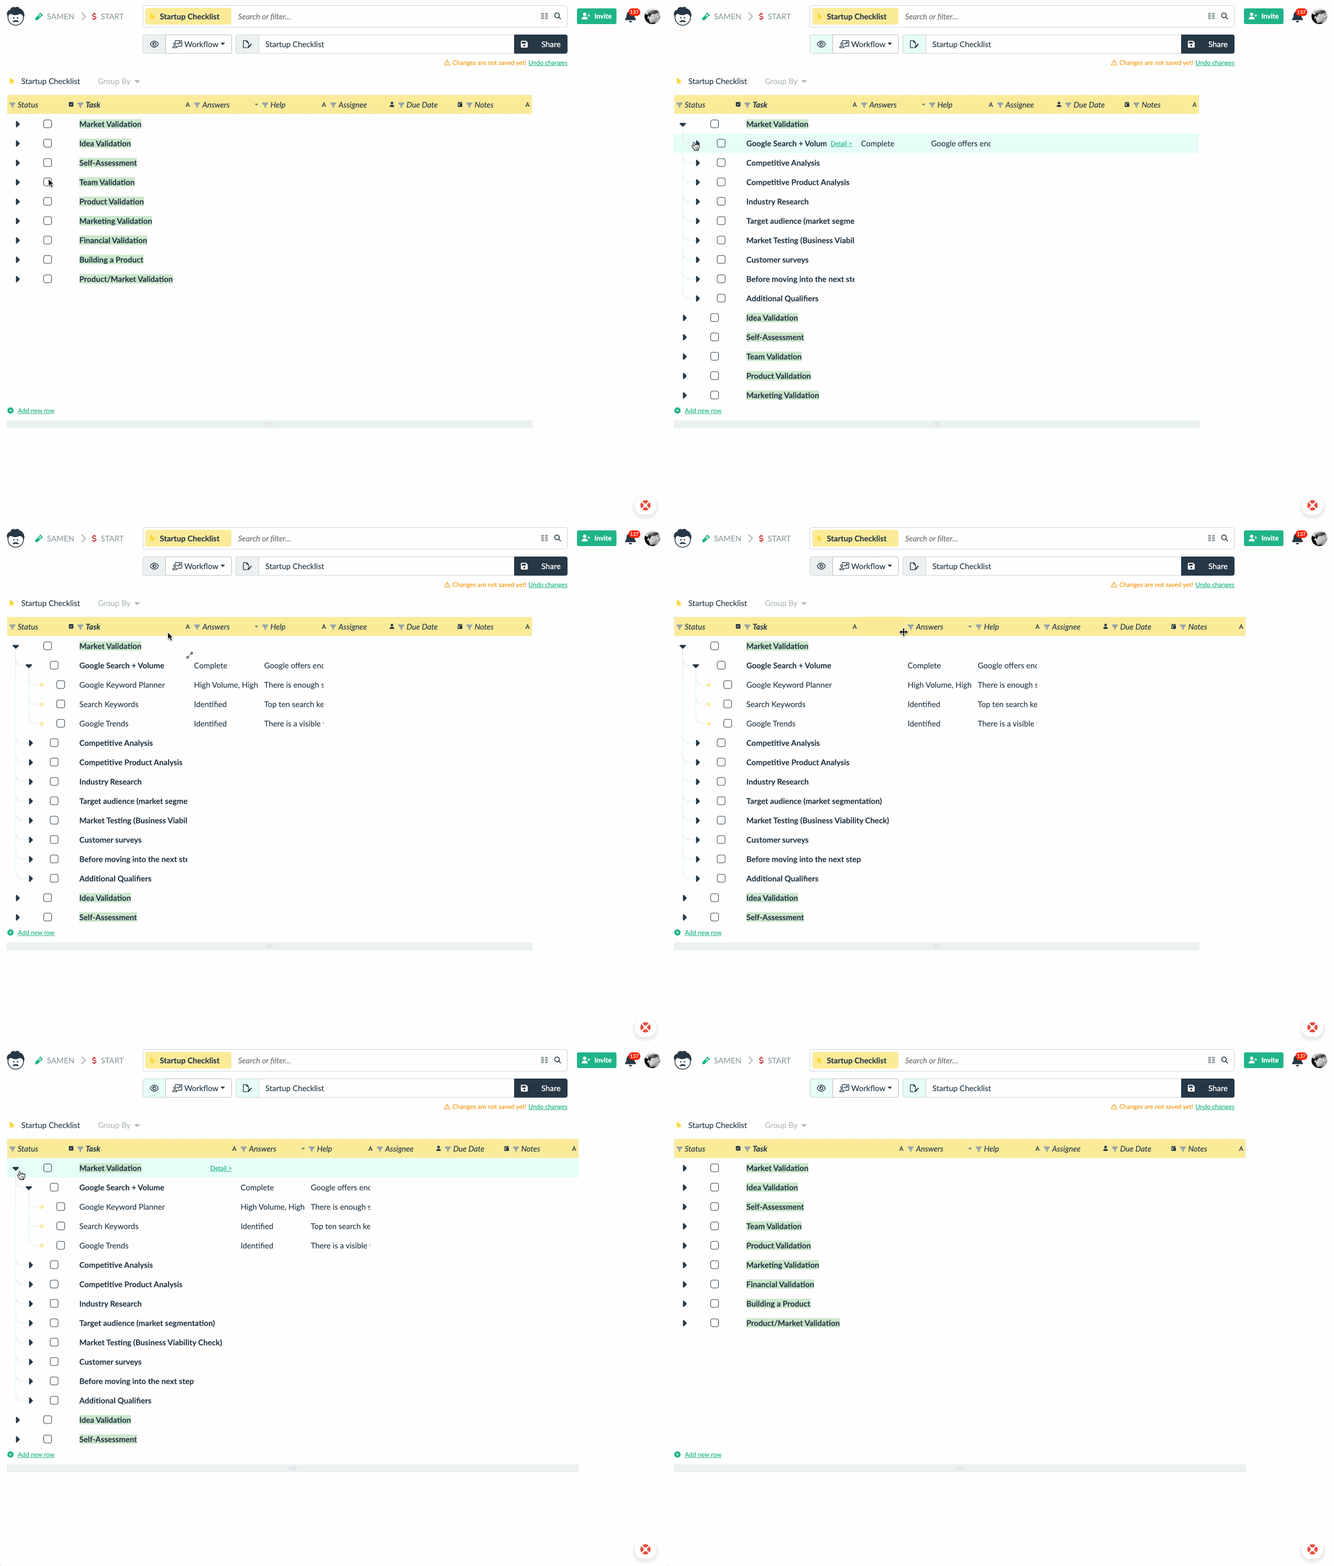
Also, remember that automations can be used to automatically mark parent tasks as completed when all the subtasks are done for instance.
Further Improvements
In the future, the Workflow view will also become a central place for visualization of processes.
We also gradually add all the features from the original table so that workflow can fully replace it in the future. Especially better support for flexible line height, conditional formatting, showing links in the table, copy’n’paste from/to spreadsheets, and more.
If you have any ideas or suggestions, please share them with us.