Using the Board View

Using the Board View is especially useful for tasks or process states. It supports the Kanban project management methodology.
In the Board view, you can work with your data records (rows) as if they were cards on a board. In addition, the board is divided into columns to allow grouping similar cards together.
Did you know that the Kanban method originated at Toyota in 1940’s?
Configuring the View
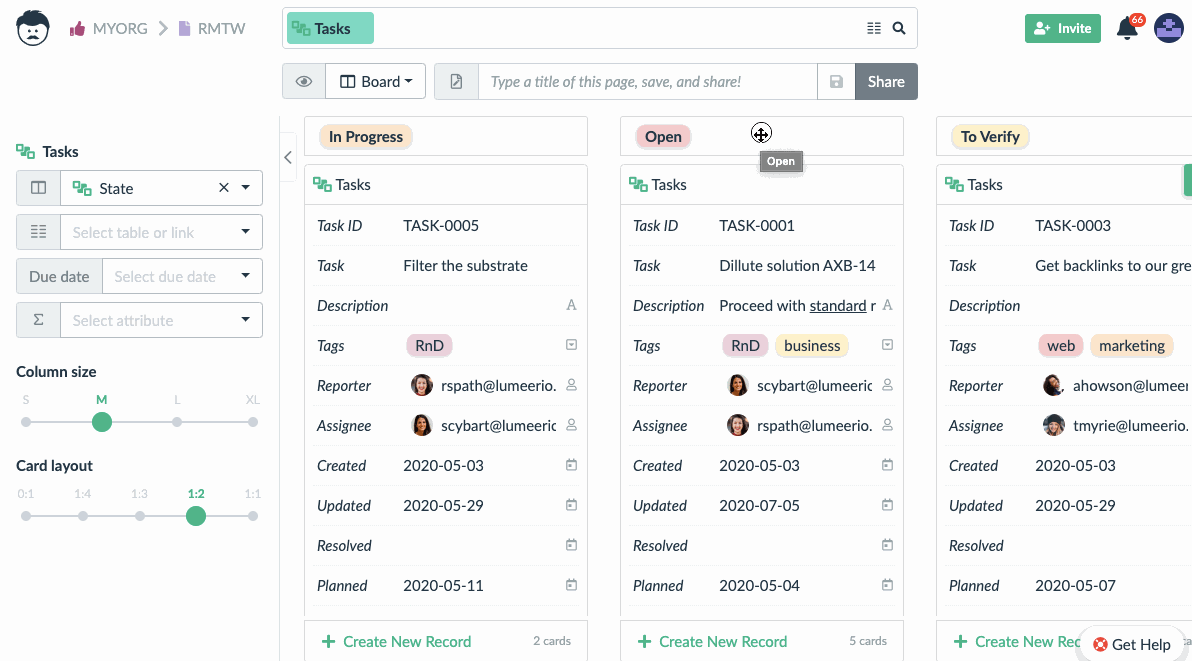
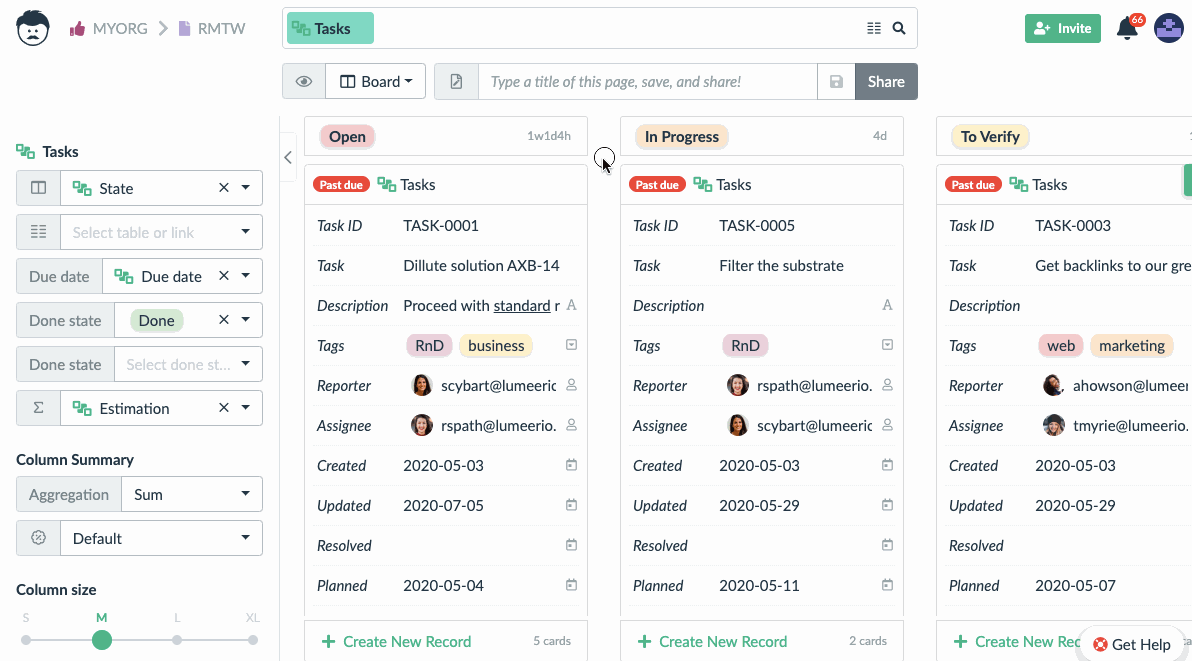
1. Setting the Column Headers
First, you need to choose a table column whose values will be used as headers of board columns.
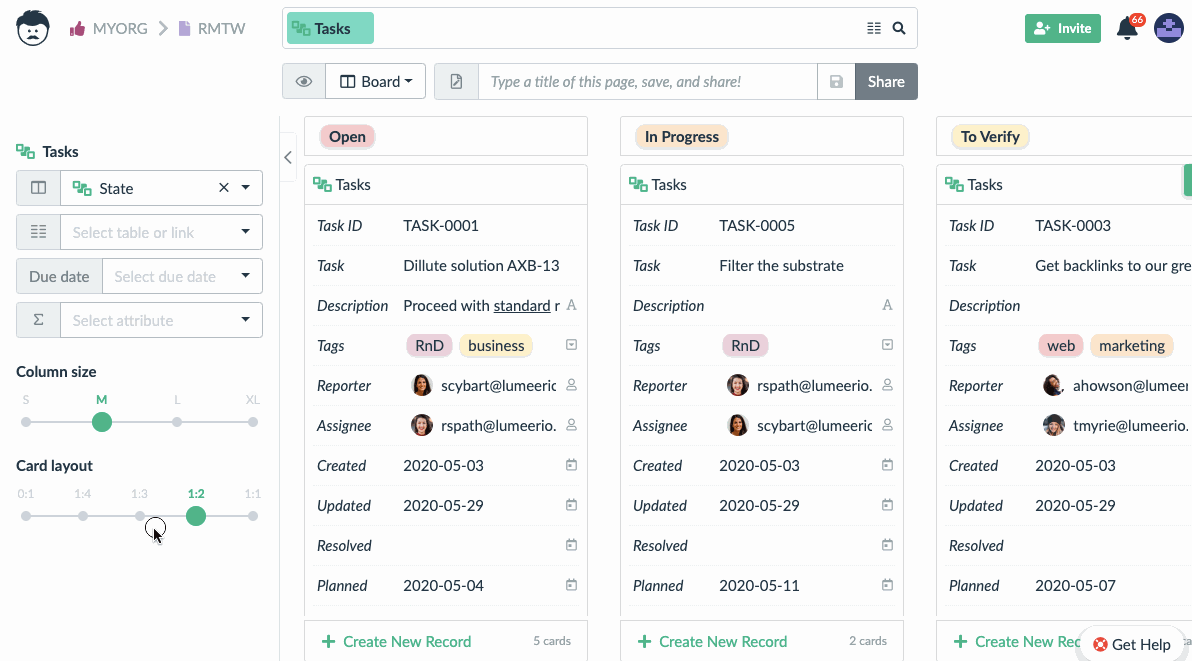
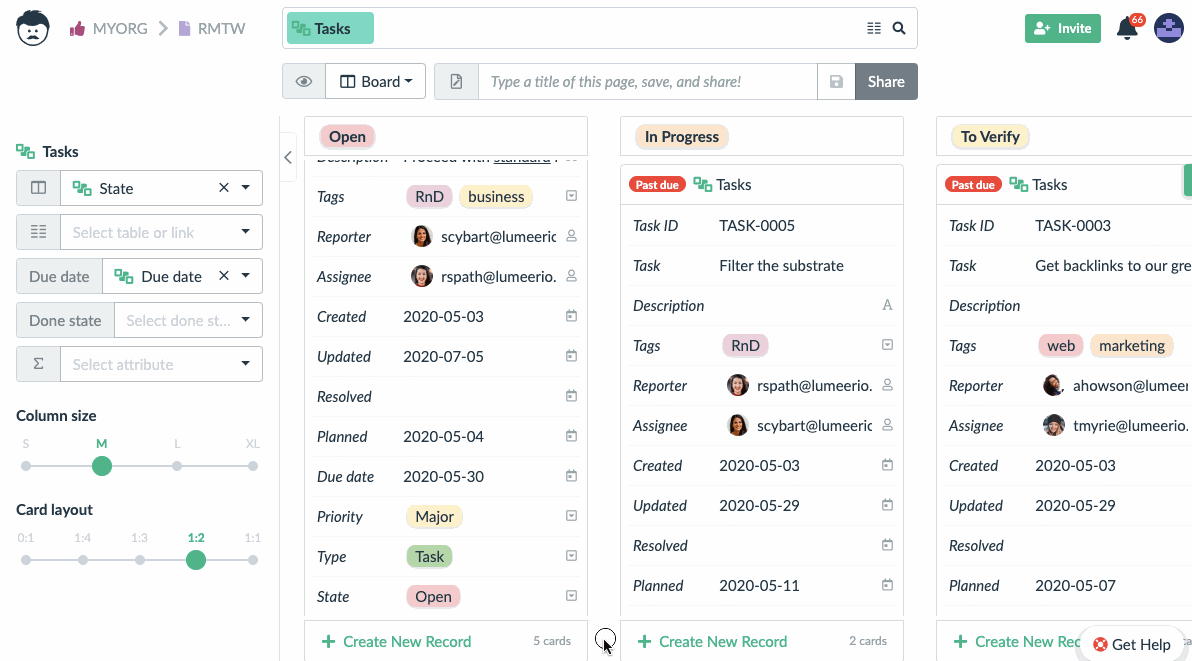
In the following animation, we choose State. That means that all cards with state Open will be in the Open column, all cards with the In Progress state will be in the In Progress column etc.
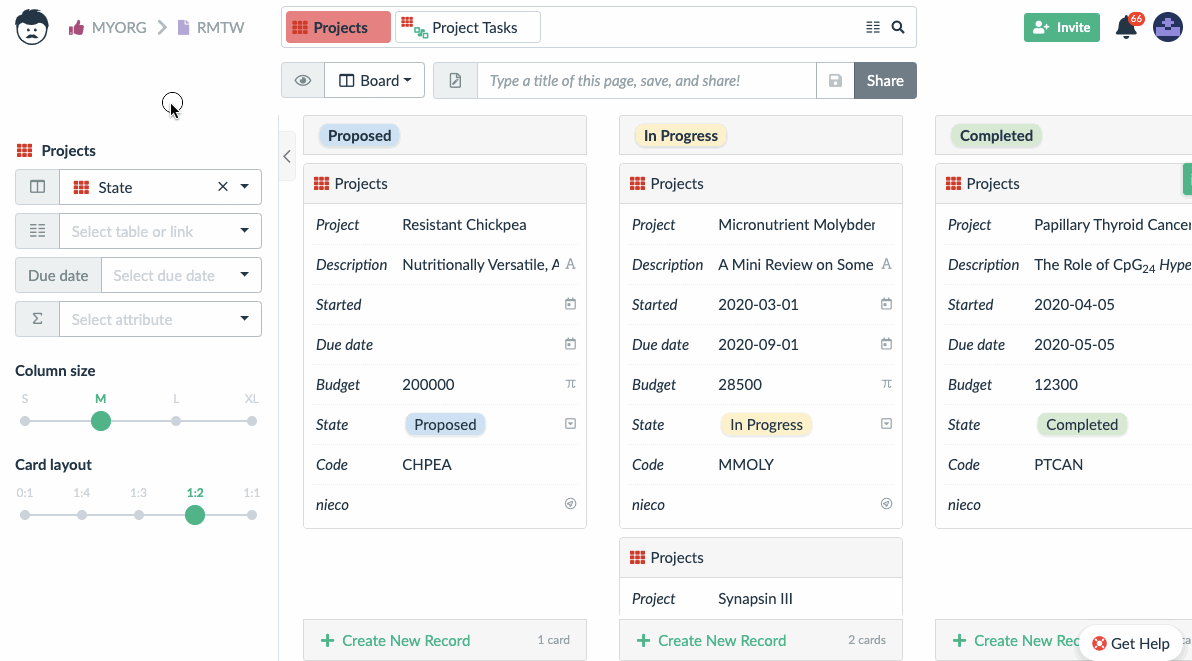
The second option (Select table or link) is useful if you are working with linked collections.
For example, if there are tasks linked to projects, you might want to sort the tasks based on their project status. In the following animation, TASK-0004 is in the Proposed column because it is linked to a project which is in the Proposed state.
Links and their attributes can also be visualized using the Board view. This is done by choosing the link name. The cards with link attributes will be displayed then.
2. Fine Tune the Visuals
You have a complete control over the visual part of the cards while using the Board view.
Choose card width that best suits your data.

Decide which ratio of attribute name to attribute values gives you the best experience (select 0:1 to hide attribute names completely).
3. Organize the Cards’ Content
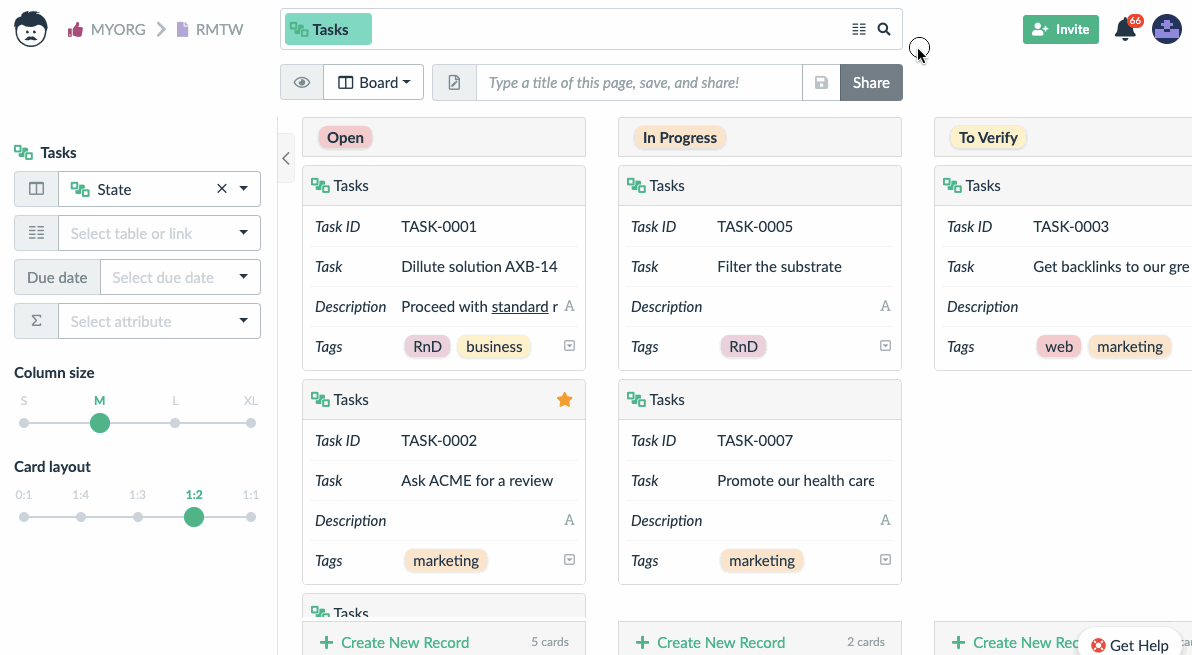
Sometimes you don’t have to see all attributes on a card. Use the switches to choose which attributes should be displayed. In addition to that, you can reorganize the order of attributes and sort cards by some of them.
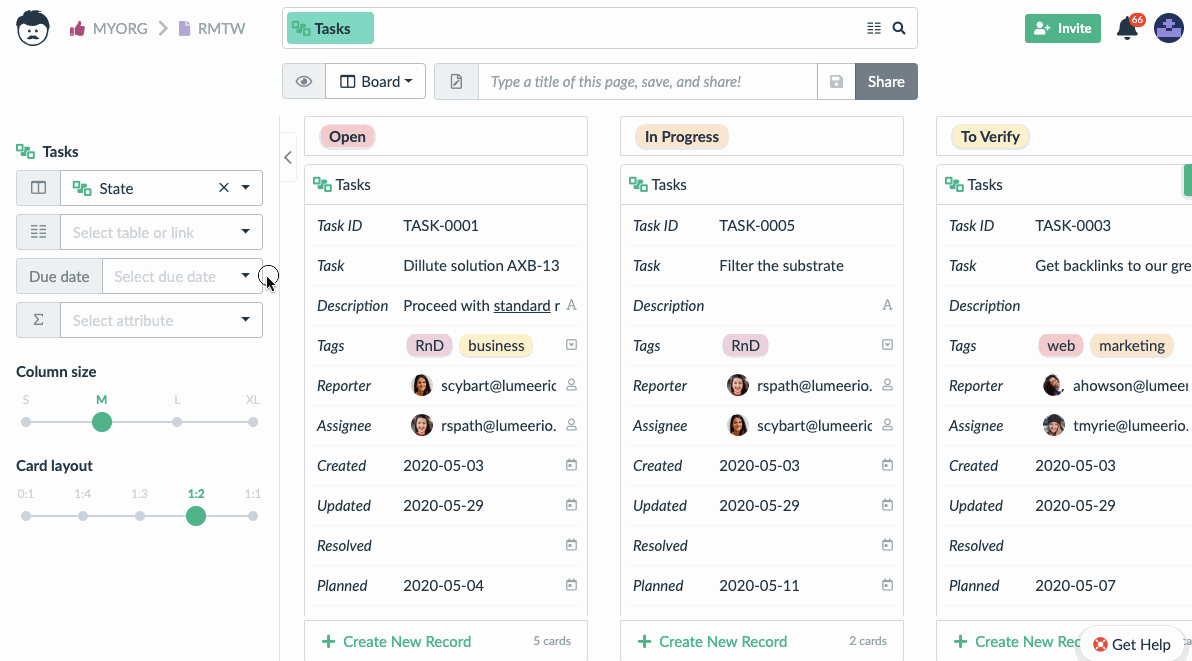
4. Rearrange the Columns
Using the Board view, you can define any sequence of the states. Drag and drop the columns to change their order.
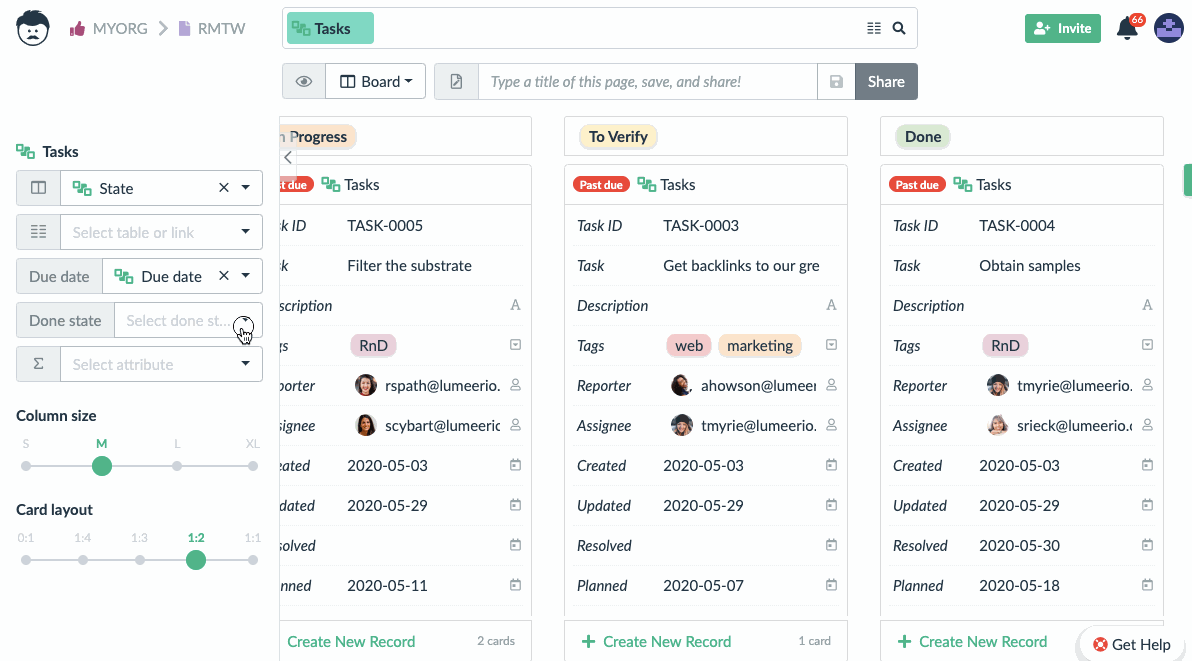
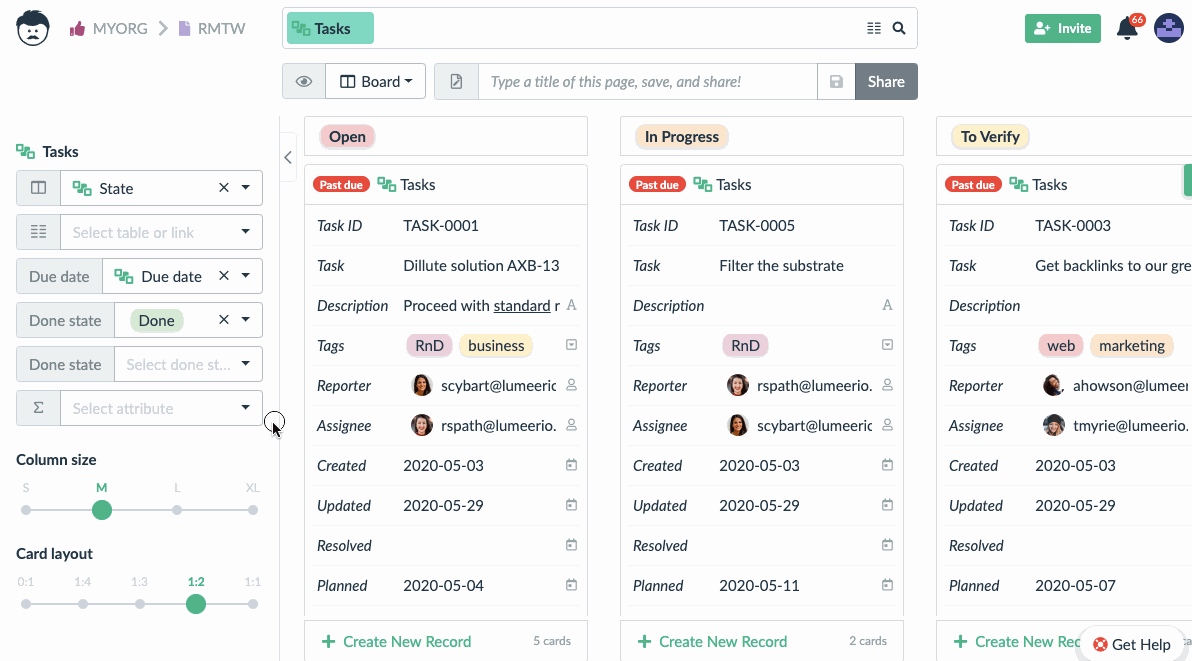
5. Use Due Dates
If there is an attribute with a deadline for the card, set it as the Due date attribute and Lumeer will visually highlight the cards that are past due or due soon (3 days / 72 hours in advance).
For some cards it’s not convenient to highlight them as past due (e.g. tasks that are already done). You can choose which columns represent Done state and past due warnings will not be displayed there.
6. Summarize the Cards
Sometimes it’s useful to have a summarized value from all the cards in a column. You can choose the attribute that you want to summarize and also the function that calculates the value (sum is the default).
How to Use Your Data in the Kanban Board View?
1. Add New Records
To add a new record (card – represented by a row in the Table view) to a column, click on the Create new record button located at the bottom of every column.
Then pick in which table the new record will be created – in this case, we have only one option because there is only one table in the search bar.
2. Edit Existing Records
Double click on the value you want to edit. After making the change, press Enter or click outside of the input box, or (in case of the date and time input) click on the Save button.
Icons on the right side show what attribute data type the value has.
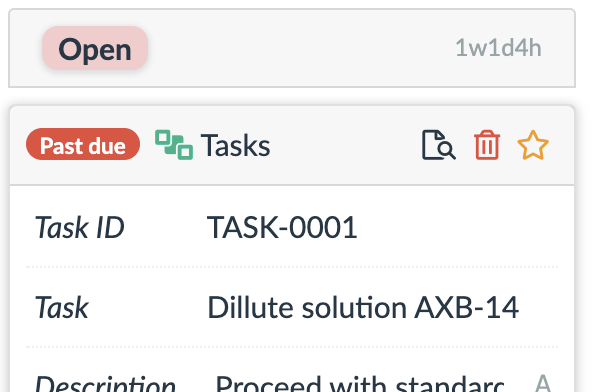
If you hover over the card, three icons are displayed in the top-right corner:
- show detail of the card
- delete the card
- mark the card as favorite (will move the card to the top in the Search view)
3. Move the Cards
To move a card to a different column, simply drag and drop it from one column to another.
This also automatically changes the value of the State attribute. Also, changing the value of the State attribute, moves the card.