How to track progress of a project on a board – 4 tips

In the era of lists and tables, there is a simple trick to increase your productivity: Use a board! These 4 tips on how to track progress of a project on a board will help you make the most of it:
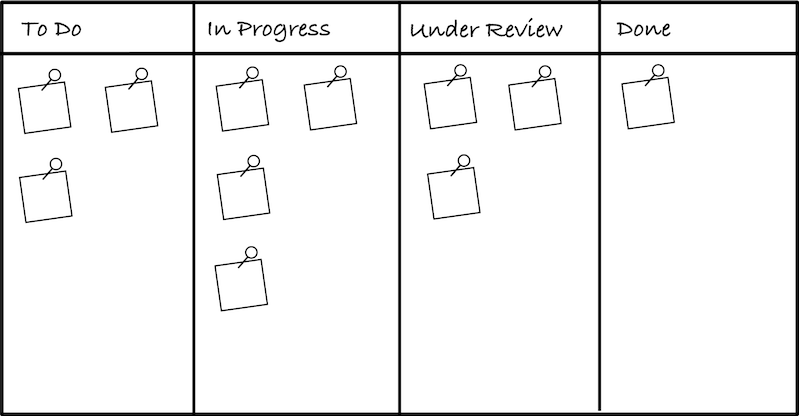
#1: See the overall progress of the project
With the board, it’s very easy to see the overall status of the project.
The rules are simple:
- Every task has its card.
- Every status has its column.
- Every card is placed in a column depending on its status.
Column status should correspond to the workflow. If you haven’t defined your workflow yet, you should definitely do it – custom workflows increase efficiency.
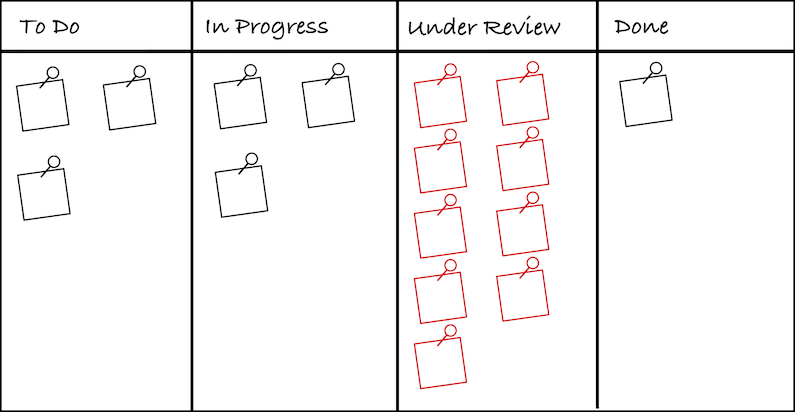
#2: Spot the bottlenecks
If there are too many tasks waiting for review to be finished, you may not spot it easily in a spreadsheet.
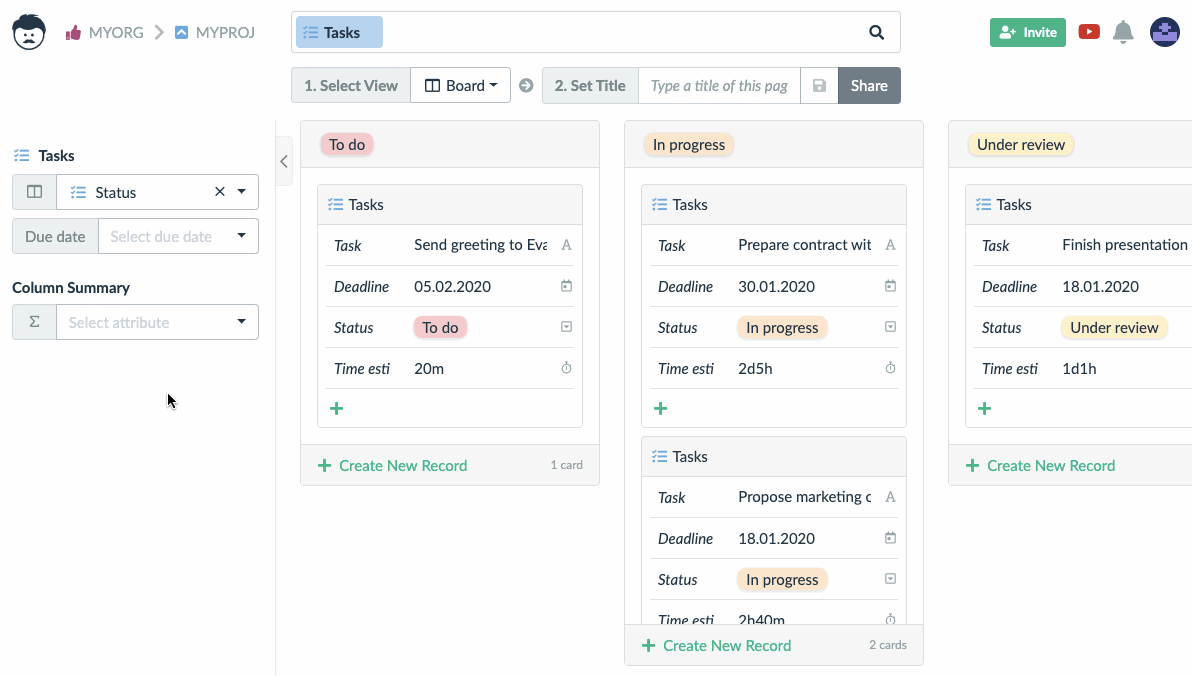
With the board, you see it immediately: There are so many cards in that column! No bottleneck will ever escape your attention.
#3: Introduce work-in-progress limits
Too much work in progress requires your (and your colleagues’) attention to be split among too many things. That is certainly not good for productivity.
The solution is to introduce work-in-progress (WIP) limits and restrict the amount of unfinished work.
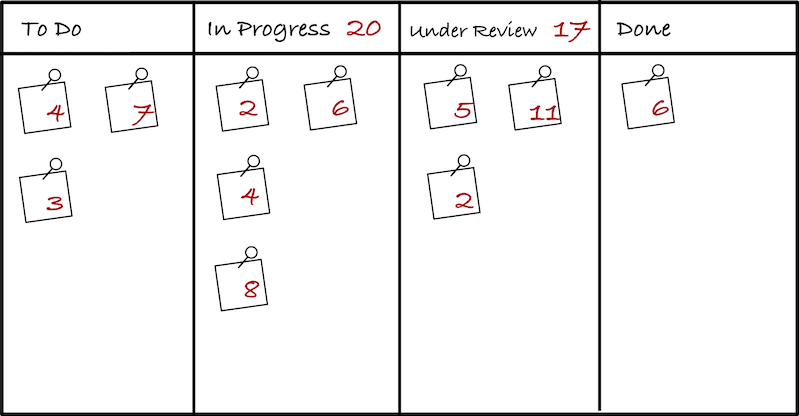
Too many cards in the Under Review column (as in the previous picture) definitely signal too much work in progress. But not all cards are created equal, and tasks on some of the cards may require more work than others. Therefore, counting the cards is sometimes not enough.
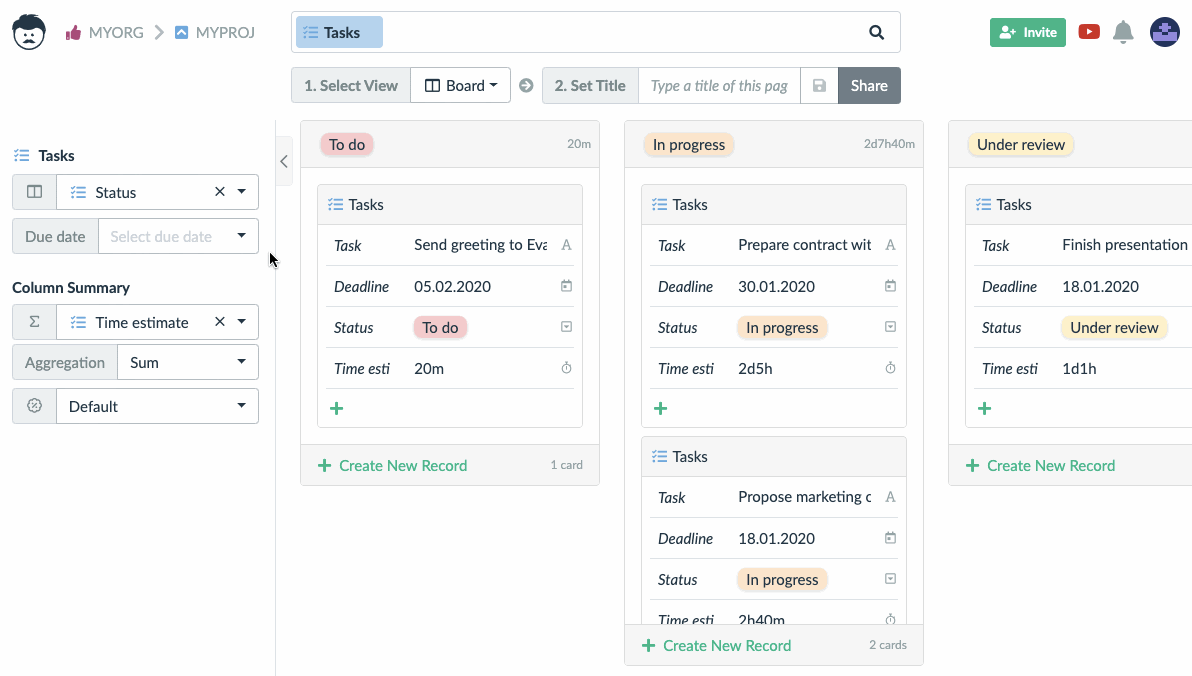
The complexity of the task can be measured by various metrics (e.g. time estimates or story points). By looking at how much work, not how many tasks, is in progress, you get more accurate information about the workload.
By committing to keep work in progress limited, you increase your focus and productivity.
#4: Don’t lose track of dates
No one likes missed deadlines.
If the end of the project is near and every day you are in a hurry to finish the work for the day, you certainly don’t want to miss anything.
Or even if you are progressing steadily and happily, you want to make sure that no task gets forgotten.
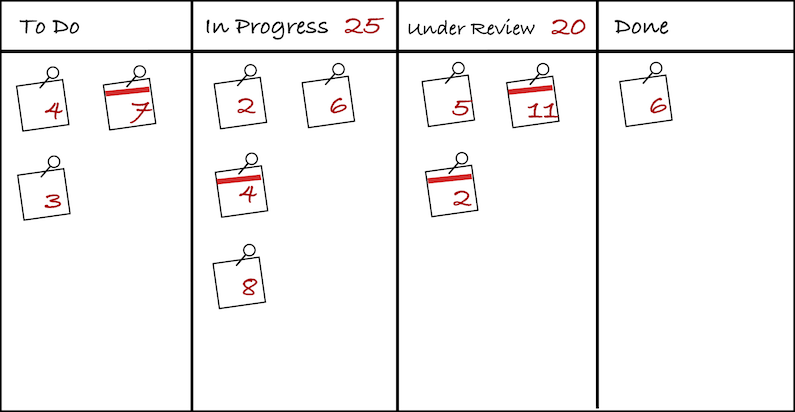
A simple visual cue (like a red ribbon) will direct your attention towards what’s important now, so that you always pick up the most relevant work for the day.
Which board to use?
You can always start with post-its and a physical board with lines dividing it into columns.
However, it will require everyday manual effort to update work-in-progress values and mark the cards that are due soon.
To make full advantage of WIP limits and highlighted high priority items, we recommend using a software tool like Trello, Jira or Lumeer which is the only one that provides all the four features.
| Physical board | Jira | Trello | Lumeer | |
| Custom columns | yes | yes | yes | yes |
| Due dates | no | yes | yes | yes |
| Summation values | no | only issue count | no | yes |
| Easy to set up | yes | no | yes | yes |
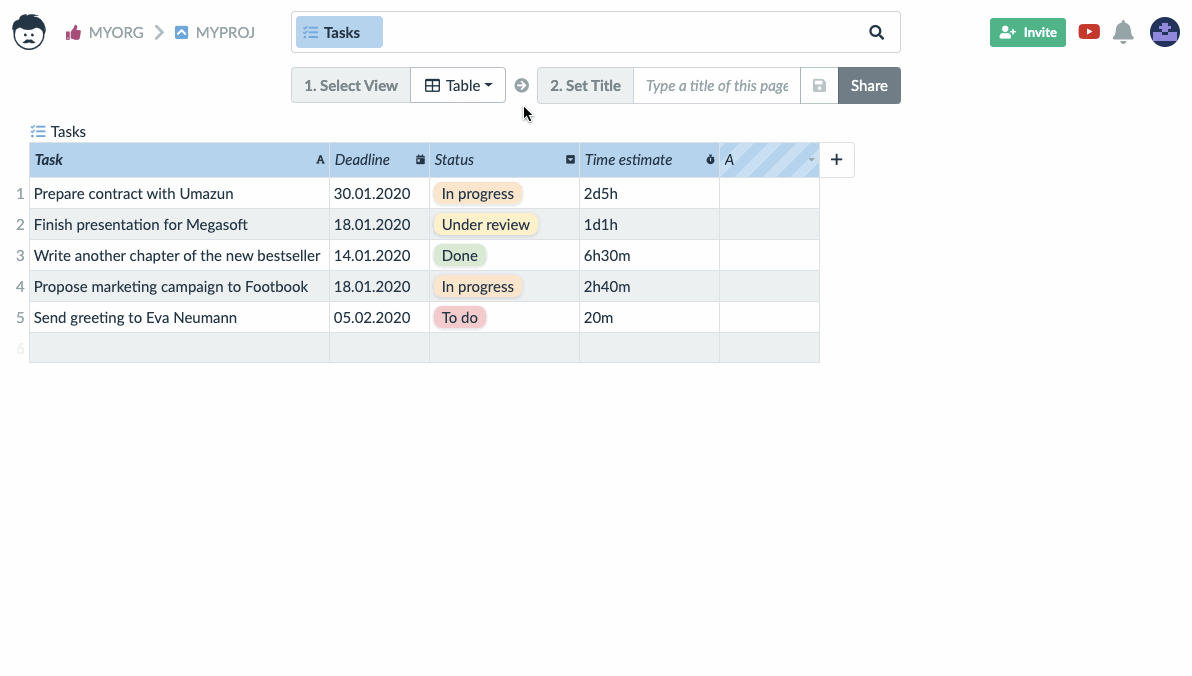
In Lumeer, just a few clicks are needed to create a board from a table:
Then you set the summation value to your metric of work complexity like time estimate:
And in the end, you display a visual cue for tasks that are due today or tomorrow (the animation was recorded on January 18th, 2020):
And that’s it! Your board is now set up and ready to use.
Conclusion
A board is a simple tool to track progress of a project which increases your productivity in multiple ways. You can use either a software tool or a physical whiteboard to achieve better results, but only some of the software tools will provide you with all the benefits.